Notice: Function _load_textdomain_just_in_time was called incorrectly. Translation loading for the twentytwenty domain was triggered too early. This is usually an indicator for some code in the plugin or theme running too early. Translations should be loaded at the init action or later. Please see Debugging in WordPress for more information. (This message was added in version 6.7.0.) in C:\inetpub\wwwroot\blogs\wp-includes\functions.php on line 6121
Aryan – Page 3 – Club TechKnowHow!
Categories
Java Script & JQuery Programming

Communicating via the SerialPort using Electron.js

The serial port is like a digital messenger that electronic devices use to share information. If you have ever workeded with an Arduino or Raspberry Pi, you may know that we create a serial connection, and begin sending information over a specific baudRate. The outputs are generally viewed on a serial monitor. Now we being computer science students must know how to integrate this hardware with software as well. How can we use the data being sent by the Arduino or Raspberry Pi inside a script, webb application, mobile application or a desktop application. For this multiple languages and frameworks support communication via the SerialPort, however using these is troublesome for beginners at first as we will see in the article.

Programming the microcontroller

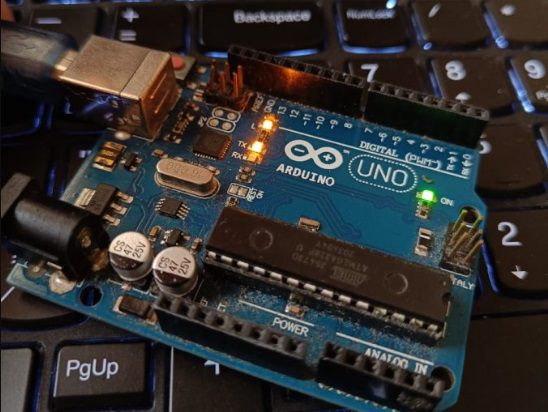
Let us begin by first writing a simple script which sends data over the serial port form the microcontroller. For this you will need a microcontroller, in my case I am using an Arduino UNO, the cable that connects the microcontroller to the laptop and the Arduino IDE, you can also use the Arduino Web Editor if you do not wish to install the IDE.

We will be writing a simple code which does the following:

  • Creates a serial connection
  • Continuously sends data over the connection
// main.ino

void setup() {
  Serial.begin(115200);  // baudRate
}

void loop() {

  int randomNumber = random(100); // generates random number
  Serial.println(randomNumber); // prints to serial monitor
  delay(100); // pause for 100 miliseconds
}

Now upload it to the microcontroller using the upload button on the top left corner and see the results on the serial monitor.

If the serial monitor is not visible then click the button on the top right corner which looks like a magnifying glass. Okay so now that we have setup the script for the microcontroller lets try to read it.

Using javascript to read from serialport

So if you try to find the code on ChatGPT you find the following code, where you will have to just replace the portName and baudRate and it should work just fine.

// main.js

const SerialPort = require('serialport');
const Readline = require('@serialport/parser-readline');

const port = new SerialPort('COM8', { baudRate: 115200 });
const parser = port.pipe(new Readline({ delimiter: '\n' }));

parser.on('data', (data) => {
  console.log('Data from serial port:', data);
});

port.on('error', (err) => {
  console.error('Error:', err.message);
});

The first thing that you realise after running this is that something is wrong because this isn’t working?!
Note you will need npm and install the serialport module using the command npm install serialport. To run the javascript file simply use node /path/to/js-file in the terminal. In my case it was node main.js.
What do you even mean by SerialPort is not a constructor?? These kind of error arise due to the change in the way the constructor is called which was probably brought in, in a later version of the package. So lets see the changes you’d have to do to this code to get it to work.

// main.js

const { SerialPort } = require('serialport');
// instead of const SerialPort = require('serialport');

const port = new SerialPort({ 
    path: 'COM8',  
    baudRate: 115200 
});

// note that all params are passed 
// as an object to the SerialPort
// constructor

So it should work now right? No its not going to work that easily 😂😭 The next error you’re going to get it with the ReadLine constructor. It would look somewhat like this.
So again this is an error with the declaration of the ReadLine module and the way the constructor is called. So looking at the docs now the correct syntax is as follows.

// main.js

const { SerialPort } = require('serialport');
const { ReadlineParser } = require('@serialport/parser-readline')

const port = new SerialPort({ path: 'COM8',  baudRate: 115200 });
const parser = port.pipe(new ReadlineParser({ delimiter: '\r\n' }))

parser.on('data', console.log)

So now it should surely work right? I mean its just a 5 line code, what could go wrong? So lets run it.

Okay so we have not encountered that type of error before. This error has arisen because the access to the serialport was denied to our code. This is a very beginner mistake that almost everyone makes and it is a very simple error to solve. When we ran the code in the Arduino IDE we used the serial-monitor to see the output. Only one process can have access over the serialport at a time, and since the access was with the serial-monitor we got this error. So now if we go back and close the serial-monitor and then run our code using node main.js we shoult be able to see the desired outputs.
But why stop here. Lets try to use this ‘working’ code in a desktop application.

Electron

Electron.js is a javascript framework designed to create cross platform desktop applications using web technologies like HTML/CSS/JS that are rendered using a version of the chromium browser engine and a backend using the node.js run-time environment.

Let us try to build a basic desktop application which will listen over a serialport at a specific baudrate and display the data in our application.

Setup

The setup of the application is pretty simple. Run the following commands.

  1. npm init -y
  2. npm install electron serialport
  3. In package.json add "start": "electron .", to scripts
  4. Replace index.js with main.js in the main section in package.json
  5. touch main.js renderer.js index.html style.css

Creating main window

Paste the following code inside the main.js file. This simple creates a window of size 500×600 and it’s a standard boilerplate template.

// main.js

const { app, BrowserWindow } = require("electron");
const path = require("path");
const isMac = process.platform === "darwin";

function createMainWindow() {
  const mainWindow = new BrowserWindow({
    title: "Propulsion Testing Software",
    width: 500,
    height: 600,
  });

  mainWindow.loadFile(path.join(__dirname, "index.html"));
  mainWindow.maximize();
  //mainWindow.setFullScreen(true);
}

app.whenReady().then(() => {
  createMainWindow();
  app.on("activate", () => {
    if (BrowserWindow.getAllWindows().length === 0) {
      createMainWindow();
    }
  });
});

app.on("window-all-closed", () => {
  if (!isMac) {
    app.quit();
  }
});

Now let us write the HTML and CSS code to structure and style the page.

<!-- index.html -->

<!DOCTYPE html>
<html lang="en">
<head>
    <meta charset="UTF-8">
    <meta name="viewport" content="width=device-width, initial-scale=1.0">
    <title>Serial Reader</title>
    <link rel="stylesheet" href="style.css">
</head>
<body>
    <div class="content">
        <h1>Serial Reader</h1>
    <h3>This data is being streamed from the serial port: </h3>
    <div class="serial-content">
        <p id="serial-content"></p>
    </div>
    <script src="renderer.js"></script>
    </div>
    
</body>
</html>
/* style.css */

body{
    background-color: rgb(62, 62, 62);
    display: flex;
    flex-direction: column;
    align-items: center;
    justify-content: center;
}
.content{
    background-color: black;
    margin-top: 20%;
    height: 50vh;
    width: 70%;
    border-radius: 10px;
    color: white;
    padding: 20px;
}
.serial-content{
    background-color: rgb(95, 95, 95);
    width: 40%;
    height: 40px;
    border-radius: 10px;
    color: black;
}
#serial-content{
    padding-left: 20px;
    padding-top: 10px;
    font-size: 20px;
    font-weight: 600;
    color: white;
}

With this we have completed the basic setup of a basic electron.js application.

Renderer.js

Now we should be able to simply copy paste the code written here inside the renderer.js file and ideally it should work. Let us try that.

Paste the code below inside renderer.js

// renderer.js

const { SerialPort } = require("serialport");

const port = new SerialPort({ path: "COM8", baudRate: 115200 });
const serialDisplay = document.getElementById("serial-content");

window.addEventListener("DOMContentLoaded", function () {
  port.on("readable", function () {
    const data = port.read().toString();
    console.log("Data:", data);
    serialDisplay.textContent = data;
  });
});

Now let us run the application using npm start.

What do we observe? There are no errors visible in the terminal however the code isnt working. If we open the dev-tools using Ctrl + Shift + Iwe can see that we have the following error.
Okay so let us try to understand why we might’ve gotten this error. In electron.js there are 2 types of processes. The main process and a renderer process. The main process is the one that creates windows, under which multiple renderer processes can run. By default these renderer processes do not have access to using node modules out of the box. For this you will have to enable nodeIntegration in the main.js file like so. And this is what even ChatGPT would tell you to do.

// main.js

// ...rest of the code
const mainWindow = new BrowserWindow({
    title: "Propulsion Testing Software",
    width: 500,
    height: 600,
    webPreferences: {
      nodeIntegration: true,
    }
});
// ...rest of the code

Let us see if this works or not. Run the application again using npm start.

It doesn’t work?! If we enabled nodeIntegration we should be able to require('serialport') in renderer.js but that is not the case. Now ChatGPT would tell you to use something called the ipcRenderer and the ipcMainto solve this issue. IPC stands for inter process communication. Since we are unable to use node modules inside the renderer process it will suggest you to either read the data in your main process or setup a preload script for your renderer process. The main idea behind this approach being to read the data in one place and send the data over ipc to the desired file.

You can try this approach however even this won’t work immediately. Also at times you would not want to use ipc as that would involve streaming the data twice! As mentioned here we must set enableRemoteModule to true and contextIsolation to false. ContextIsolation allows us to build a contextBridge to enable certain functions and services to the renderer process from the preload script which it would not have access to by default. Since we won’t be using this we will set it to false.

// main.js

// ...rest of the code
webPreferences: {
      nodeIntegration: true,
      contextIsolation: false,
      enableRemoteModule: true,
}
// ...rest of the code

Now when we run the application it should work perfectly!👌

If you face any other errors apart from the above mentioned, do let me know in the comments below👇

Categories
Java Script & JQuery Programming

Creating a REST API using Node.js & Express.js

Following up on the previous article where we discussed what RESTful APIs are and how to create one in python using Django, in this article we will go over how to create a connection with a MySQL database and then perform crud operations using the data streamed through the database using node.js and express.js. Let us go over how to perform this step by step by creating a REST API for course info.

Creating a table in MySQL & populating it with data

First create a schema and name it courses. Then create a table for all_courses and define the required fields. For this demonstration we will have fields for id, year, course_name, faculty and slot. To do so run the following script.

-- Schema.sql

USE courses;
CREATE TABLE all_courses (
    id integer PRIMARY KEy AUTO_INCREMENT,
    year VARCHAR(255) NOT NULL,
    course_name VARCHAR(255) NOT NULL,
    faculty VARCHAR(255) NOT NULL,
    slot TEXT NOT NULL
);

Notice that the id field is a PRIMARY KEy and it auto-increments. We are not required to pass in the id parameter while pushing data into the table, the table with automatically assign it a value of the id of the previous entry plus one. The remaining fields must be passed when creating entries.
Now let us populate this table with some dummy data. You can change the following data to create your custom entries.

-- Schema.sql

INSERT INTO all_courses (semester, course_name, faculty, slot)
VALUES
('First','Biology101', 'Professor Smith', 'A1'),
('Second','Physics202', 'Dr. Johnson', 'B1'),
('First','Chemistry303', 'Professor Davis', 'C1'),
('Third','History404', 'Dr. Taylor', 'D1'),
('Fourth','Mathematics505', 'Professor Miller', 'E1'),
('First','English101', 'Dr. Brown', 'A1'),
('Second','ComputerScience202', 'Professor White', 'B1'),
('First','Psychology303', 'Dr. Martinez', 'C1'),
('Third','Economics404', 'Professor Turner', 'D1'),
('Second','Sociology505', 'Dr. Hill', 'E1'),
('Fourth','Philosophy101', 'Professor Carter', 'A1'),
('First','Music202', 'Dr. Reed', 'B1'),
('Second','PoliticalScience303', 'Professor Hall', 'C1'),
('First','Geography404', 'Dr. Allen', 'D1'),
('Second','EnvironmentalScience505', 'Professor Scott', 'E1'),
('Fourth','Art101', 'Dr. Garcia', 'A1'),
('First','Linguistics202', 'Professor Lee', 'B1'),
('First','Astronomy303', 'Dr. Adams', 'C1'),
('Third','Marketing404', 'Professor Wright', 'D1'),
('Third','Statistics505', 'Dr. Lopez', 'E1')

Creating a connection with database

Once we have created and populated the database with dummy data we can proceed to create a connection with our MySQL database. First create a new node project using the npm init  command. This will initialize a new Node.js project and create a package.json file in the current directory. Now install the MySQL package for your node.js project using npm install mysql2. Now we can write a script to create a connection with our MySQL database.

const mysql = require('mysql2');

const connection = mysql.createConnection({
  host: 'localhost',
  user: 'root',
  password: 'password',
  database: 'database_name'
});

connection.connect((error) => {
  if (error) {
    console.error('Connection Failed.', error);
  } else {
    console.log('Connected Successfully!');
  }
});

connection.end();

Now we could use this connection to query data from the database like so
connection.query("SELECT * FROM all_courses") however we would be using a pool of connections instead of a single connection.

const mysql = require('mysql2'); 

const connection = mysql.createPool({ 
    host: 'localhost', 
    user: 'root', 
    password: 'password', 
    database: 'database_name' 
}).promise()

Notice the .promise(), it transforms the query method into a function that returns a Promise. This allows you to handle asynchronous operations more conveniently using promises or async/await syntax.
createPool maintains a pool of connections that can be reused. This is beneficial in scenarios where there are frequent database operations, as creating and closing connections repeatedly can be resource-intensive.

Writing a functions to perform crud operations

To perform CRUD operations we will write these functions – getCourses(), addCourse(), updateCourse() and deleteCourse.

async function getCourses() {
    const [rows] = await pool.query("SELECT * FROM all_courses");
        return rows
}

async function addCourse(year, course_name, faculty, slot) {
    const [result] = await pool.query(
        `INSERT INTO all_courses (year, course_name, faculty, slot)
        VALUES (?, ?, ?, ?, ?)`,
        [year, course_name, faculty, slot]
    );
    return result;
}

async function updateCourse(course_name, newFaculty, newSlot) {
    const [result] = await pool.query(
        `UPDATE all_courses
        SET faculty = ?, slot = ?
        WHERE course_name = ?`,
        [newFaculty, newSlot, course_name]
    );
    return result;
}

async function deleteCourse(course_name, faculty, slot) {
    const [result] = await pool.query(
        `DELETE FROM all_courses WHERE course_name = ?, faculty = ?, slot = ?`,
        [course_name, faculty, slot]
    );
    return result;
}

If you are confused why we have used ? to pass the arguments, instead of directly using the variables refer our article on SQL injections to see why we do this.

Setting up the express application for get and post requests

Install express using npm install express and import express, db.js the file where you wrote the functions to query data to and from the database and all the functions.

const express = require('express')
const db = require('./db.js');
const addCourse = db.addCourse;
const getCourses = db.getCourses;
const updateCourse = db.updateCourse;
const deleteCourse = db.deleteCourse;

app.use(express.json())

app.get('/allcourses', async (req, res) => {
    const courses = await getCourses()
    res.send(courses)
})

app.post('/add', async(req, res) => {
    const { year, course_name, faculty, slot } = req.body
    const added_courses = await addCourse(year, course_name, faculty, slot)
    res.status(201).send(added_courses[0])
})

app.put('/update/:course_name', async (req, res) => {
    const course_name = req.params.course_name;
    const { faculty, slot } = req.body;

    try {
        const updatedCourse = await updateCourse(course_name, faculty, slot);
        res.send(updatedCourse[0]);
    } catch (error) {
        console.error(error);
        res.status(500).send('Internal Server Error');
    }
})

app.delete('/delete', async (req, res) => {
    const { course_name, faculty, slot } = req.body

    try {
        const result = await deleteCourse(course_name, faculty, slot);
        if (result.affectedRows > 0) {
            res.status(204);
        } else {
            res.status(404).send('Course not found');
        }
    } catch (error) {
        console.error(error);
        res.status(500).send('Internal Server Error');
    }
});

Our REST API is ready and now you can integrate this in any javascript project.

Note of caution

When pushing code to production of a shared version control system make sure that your connection details to the database like the table, username, password are not accessible to the viewer. This can be done using dotenv. Simple install it using npm install dotenv. Import it into db.js like so
const dotenv = require('dotenv') and configure it using dotenv.config(). Now you can create a .env file in the same directory and replace the host, user, password and database like so.

const pool = mysql.createPool({
    host: process.env.MYSQL_HOST,
    user: process.env.MYSQL_USER,
    password: process.env.MYSQL_PASSWORD,
    database: process.env.MYSQL_DATABASE
}).promise()

Now your database details won’t be visible to people viewing your code.

Categories
Programming Python

RESTful APIs

The concept of APIs is pretty fascinating when starting to code, because it allows us to integrate stuff into our projects which we would not want to develop ourselves. An API in short is just an interface for software applications to communicate. Its like the WhatsApp for applications. Let us assume you have an e-commerce application and you want to enable payments you can simply use the RazorPay API or PayTM API. Now lets dive deeper into how these APIs work, how to integrate them into out applications and by the end of this article you would have the working knowledge on how to create your own RESTful API.

What is a RESTful API?

A REST API is a way for computer programs to talk to each other over the internet. It follows certain rules to perform actions like getting data, adding new information, updating, or deleting. This is done typically using HTTP requests. There are multiple HTTP requests but we shall discuss GET, POST, PUT & DELETE as these are the ones which are most commonly used.

Now recently I was brushing up my matplotlib and wanted to plot 4 graphs in real-time and all 4 of them would be running on separate threads. For this i wanted data which would keep changing every second. For this I used the ‘Where the ISS at?’ API. This API provides you with the following information about the ISS(International Space Station) every second.

{
    "name": "iss",
    "id": 25544,
    "latitude": 50.11496269845,
    "longitude": 118.07900427317,
    "altitude": 408.05526028199,
    "velocity": 27635.971970874,
    "visibility": "daylight",
    "footprint": 4446.1877699772,
    "timestamp": 1364069476,
    "daynum": 2456375.3411574,
    "solar_lat": 1.3327003598631,
    "solar_lon": 238.78610691196,
    "units": "kilometers"
}

This API allows you to only GET the data, however this seems like a pretty basic example which showcases how these kinds of APIs work.

Where are RESTful APIs used?

In simple words a RESTful API allows CRUD based operations on a database. CRUD stands for CREATE, RETRIEVE, UPDATE, DELETE. Assume you have a Todo Application, in it you would be required to perform CRUD operations on the Todos. For this we can setup a RESTful API using which our web application or mobile application can send HTTP requests to perform the operations.

How do you send HTTP Requests?

To send HTTP requests, you typically use a programming language or a tool that supports HTTP communication. Here’s a brief overview:

If you are using python you are required to import the requests library.

import requests

response = requests.get("__endpoint_of_the_api_you_are_trying_to_hit__")  # the url is also called the endpoint of the API
print(response.body)

If you are using javascript you can directly use the fetch function.

fetch("__endpoint_of_the_api_youre_trying_to_hit__")
  .then(response => response.json())
  .then(data => console.log(data))
  .catch(error => console.error('Error:', error));

If you don’t know what json is, think of it as something which serves as a common data format for exchanging structured information between web servers and clients. Apart from json XML is also used for similar purposes.

How to create a RESTful API in python?

We will be using the Django framework to create a REST API in python. Let us go over the step by step approach on how to do this.

Install Django and initializing the project

Install django using the pip install django command in the terminal. It is generally advised to create a virtual environment first and then install all the dependancies.
After installing django we must create a project using the django-admin startproject myProjectYou can change the name of the project to whatever you like.
Now we must run the command pip install djangorestframework , it allows us to seamlessly create a REST API.

Navigate to the settings.py file in your project directory, in our case it is myProject. Inside it add rest_framework to the list of installed apps like so.

# myProject/settings.py

INSTALLED_APPS = [
    # other installed apps
    # add the line below to your code
    'rest_framework', 
]

Now create an app using the command python manage.py startapp api.

Creating a Model for the Data

We will now create a model of the data we are trying to store. Let us make a model for a Todo App.

# api/models.py

from django.db import models

class Todo(models.Model):
    title = models.CharField(max_length=50)
    desc = models.CharField(max_length=200)
    isDone = models.BooleanField(default=False)
    date = models.DateTimeField(auto_now_add=True)

    def __str__(self):
        return self.title

We will also have to migrate this model to the database which by default is sqlite in django. You can change it to use a different one if you like. Run python manage.py makemigrations and then python manage.py migrate to do so. If you later make changes to the models by updating existing models or by adding new models just run python manage.py migrate after making changes.

Creating a serializer

In Django, a serializer is essential for converting complex data types, such as querysets or model instances, into Python data types that can be easily rendered into JSON for API responses. Create a serializers.py file in the api folder and change its content to match the following.

# api/serializers.py

from rest_framework import serializers
from .models import Todo

class TodoSerializer(serializers.ModelSerializer):
    class Meta:
        model = Todo
        fields = '__all__'

Creating Views for Get, Create, Update, and Delete

We will create two views: TodoGetCreate for listing and creating Todo items, and TodoUpdateDelete for retrieving, updating, and deleting individual Todo items. This specifies the model (Todo) and serializer (TodoSerializer) to use for these views, streamlining the implementation of CRUD (Create, Read, Update, Delete) operations for the Todo API.

# api/views.py

from django.shortcuts import render
from rest_framework import generics
from .models import Todo
from .serializers import TodoSerializer

class TodoGetCreate(generics.ListCreateAPIView):
    queryset = Todo.objects.all()
    serializer_class = TodoSerializer

class TodoUpdateDelete(generics.RetrieveUpdateDestroyAPIView):
    queryset = Todo.objects.all()
    serializer_class = TodoSerializer

 Creating urls for the Views

We will create two paths: TodoGetCreate for listing and creating Todo items, and TodoUpdateDelete for handling individual Todo items’ retrieval, updating, and deletion based on their primary key.

# api/urls.py

from django.urls import path
from .views import TodoGetCreate, TodoUpdateDelete

urlpatterns = [
    path('', TodoGetCreate.as_view()),
    path('<int:pk>', TodoUpdateDelete.as_view()), 
]

 Note doing just this won’t work as the paths for the project are being used from the urls.pywhich lies in the myProject directory. We will have to include the api.urls in the main urls.py.

# myProject/urls.py

from django.contrib import admin
from django.urls import include, path

urlpatterns = [
    path('admin/', admin.site.urls),
    path('', include('api.urls')),
]

Running the application

Run python manage.py runserver to test it out. You should be able to see it working at http://127.0.0.1:8000/ .


Categories
Tools & Platforms

Setting up your development environment for Node.js, Express.js & MySQL

In this article, we will guide you through the crucial initial steps of setting up your development environment specifically tailored for Node.js, Express.js, and MySQL. By the end of this tutorial, you’ll have a well-configured environment, providing you with the necessary tools and resources to kickstart your MERN stack learning experience. Let’s pave the way for a seamless and efficient development process as you delve into the dynamic world of web development.

If you are following the MERN stack which includes MongoDB, you can skip the MySQL part.

Setting up MySQL

  1. Install the latest version of MySQL from their official website – https://dev.mysql.com/downloads/installer/
    Make sure that you install the non-web version.
  2. In the setup select custom and proceed to install the MySQL Server, MySQL Shell, and MySQL workbench.
    Once installed setup the root password and do not change any other settings.
  3. Now once the installation is complete go to the folder where \bin is located where MySQL Server is installed. In my case the path looked like this – C:\Program Files\MySQL\MySQL Server 8.0\bin
    But this may change based on where you have installed it.
  4. Add a new path in your Environment Variables and paste the path there.

The setup for MySQL is now complete ad we can verify this by entering MySQL –version in the command prompt. If installed correctly you should be able to see the installed version of MySQL.

Setting up Node.js

  1. Install the latest stable version of node from their official website – https://nodejs.org/en/download/current
  2. While installing make sure to check the ‘Automatically install the necessary tools.’ checkbox.

The setup for node is now complete ad we can verify this by entering node –version in the command prompt. If installed correctly you should be able to see the installed version of node.

Installing Express.js

Installing express is probably the easiest out of the lot. Open cmd and enter npm install express.

Categories
Programming

What is Bogo Sort?

Sorting algorithms are precision-driven. Among all the effective and efficient sorting algorithms exists a highly inefficient and unconventional sorting algorithm – Bogo Sort. Instead of relying on strategic computation it relies on a game of chance. The pseudocode for bogo sort is given below:

function isSorted(arr):
    for i from 0 to length(arr) - 2:
        if arr[i] > arr[i+1]:
            return false
    return true

function bogoSort(arr):
    while not isSorted(arr):
        shuffleElements(arr)

Bogo Sort is one of the algorithms which have the worst case time complexity of Ο(∞). This is because this technique relies on the sorted array to appear magically after a random shuffle of its elements. This is like playing the game of LUDO and hoping to roll a 6 on the die just wayy more intense. The best case scenario of this sort also like other sorting techniques occurs when the given input is already sorted.

This algorithm performs best when the work for it has been already done. i.e. when it is not needed.🤦🏻