Notice: Function _load_textdomain_just_in_time was called incorrectly. Translation loading for the twentytwenty domain was triggered too early. This is usually an indicator for some code in the plugin or theme running too early. Translations should be loaded at the init action or later. Please see Debugging in WordPress for more information. (This message was added in version 6.7.0.) in C:\inetpub\wwwroot\blogs\wp-includes\functions.php on line 6121
Aryan – Page 2 – Club TechKnowHow!
Categories
CodeClip Projects

Building CodeClip: Copy Your Entire Codebase Instantly

As developers, we’ve all been there: you need to share either parts of your code or sometimes your entire codebase with LLMs. The inspiration was drawn from a linkedin post I saw which showcased a tool which can copy an entire github repository which you can give to LLMs, it had a UI and everything where you could select which files you wanted to include/exclude.

This got me thinking this actually seems useful and I might actually use this. Which is when I realized that most of the time I want to give my code as context rather than code which is in a repository as we commit only after completion of a fix/feature and not while it is in development. This means I need a tool which will copy everything in my working directory.

There’s a pretty good chance that something like this probably exists but implementing a filepath.walk() felt easier than actually looking up if this actually exists. Which is why I decided to make this anyways. You can find the code to CodeClip here.

I began by laying out the requirements, which look somewhat like this:

  • Should be lightweight and quick.
  • Shouldn’t take too much time or effort to use.
  • Should copy everything to clipboard.
  • Should copy contents to a file called codebase_dump.txt

After which i started implementing it and i tested it out on a mern project i had running locally. Which is when i ran into some error. I tried to run it in the codeclip directory itself where it worked 😐

Okay so that was when i realised that the error might’ve originated out of codeclip trying to read all files from node_modules and hit a limit either while copying or writing the contents.

Soooo we need this tool to only copy files whereΒ your code lies. I implemented this just by adding a blacklist of directories and file extensions to avoid. I will be adding support for users to configure it themselves and also copy only files with certain extensions such as cclip -f .js .py .json. I will also be adding support for users to be able to choose if they want to save it to clipboard or save it to a .txt file or both.

This was just something i thought would be cool to make andΒ something i will genuinely use. You can find the code here, and if you want to try out codeclip click here.

If you have any suggestions or any feedback let me know in the comments, i would love your opinion on this, maybe we can collaborate if you’re interested on a particular feature you’d like to see in CodeClip.

Categories
Database MySQL

Automating MySQL Backups

Backing up a MySQL database running on production is crucial to ensure data integrity and availability. In the event of hardware failures, software bugs, human errors, or malicious attacks, a backup provides a reliable way to restore lost or corrupted data, minimizing downtime and operational disruption. Regular backups also support data recovery during unexpected incidents and protecting valuable information. By implementing a consistent backup strategy, we can safeguard their critical data, maintain user trust, and comply with regulatory requirements, ultimately contributing to a robust and resilient system.

A simple backup of a MySQL database can be taken manually by simply exporting the database from the MySQL Workbench, however we would not be exploring that in this article.

A MySQL database is backed up by mysqldump.exe which is located in MySQL\bin\.
mysqldump.exe creates a logical backup by exporting the database structure and data into a SQL script file that can be used to recreate the database. This can be done manually using a gui where you can select which databases and which tables to backup or we can write a script to do that.

Create backupscript.bat and paste the following code in it.

@echo off
cd "path\to\mysql\bin"

for /f "tokens=2 delims= " %%a in ('date /t') do set mydate=%%a
set mydate=%mydate:/=-%
set mydate=%mydate: =%
set mydate=%mydate:~10,4%%mydate:~4,2%%mydate:~7,2%

set backup_path=path/to/backup_folder
set backup_name=<database_name>_%mydate%

mysqldump --defaults-extra-file=path\to\my.cnf --all-databases --routines --events --result-file="%backup_path%\%backup_name%.sql"

if %ERRORLEVEL% neq 0 (
    echo [%date%] Backup failed: error during dump creation >> "%backup_path%\mysql_backup_log.txt"
) else (
    echo [%date%] Backup successful >> "%backup_path%\mysql_backup_log.txt"
)

NOTE: Make sure to replace all the paths and the database names.

Now create my.cnf and add the following to it.

[client]
user=username
password=password

Add your username and password. This is a config file which we will use to fetch details of the user to run the mysqldump.exe command. It is not recommended to enter sensitive information like passwords in the terminal hence this approach is better.

Now we can schedule to run this script using the task scheduler.

Open the tasak scheduler and click on Task Scheduler Library in the left panel. Then in the right panel selectΒ Create Basic Task… Enter the basic information and select on run script and select the backupscript.bat. Enter your desired interval for backups and we’re done!

Now your database will be backed up and you will also have a log of all the backups. If ever you accidentally lose your data you would regret not doing this. So if you’re running any projects in production make sure you backup your database. It takes less than 5 minutes and you’d be better safe than sorry.

Categories
Installation & Configuration Java Script & JQuery Tools & Platforms Web Programming

Serving Node Applications on Microsoft IIS

Over the weekend I was bored and tried hosting node applications on IIS on a server. Since currently I have only tried wordpress I had no idea how to go about this which might be why you are here, so lets dive straight into how to get it running. So first of all if you haven’t done this before you will probably not have node installed on your server. So first lets install everything that we will need.

Prerequisites

  1. If you do not have IIS (Internet Information Services) enabled; you will have to enable it.
    Search Turn Windows Features On or Off and check the box next to Internet Information Services.Β  Expand the Internet Information Services node to select additional features like Web Management Tools and World Wide Web Services. Ensure at least the following are selected:

    • Web Management Tools: Includes IIS Management Console.
    • World Wide Web Services: Includes various services for hosting websites and applications.
  2. Install node from here. Make sure that you add the path to node.exe in your environment variables. In most cases it would be C:\Program Files\nodejs\.
  3. Install iisnode from here.
  4. Install URL Rewrite from here.

Creating and Setting up the Site

  1. Open IIS Manager and click on your device in the connections panel on the left to expand it.
  2. Right click Sites and click on the Add Website... option to create a new site, and add the domain name you want it to show up on in the hostname and check the start website immediately.
  3. Add 127.0.0.1 to your Site from the bindings in the right pane in your site’s page in IIS.
  4. Check if iisnode is installed in modules.
  5. Locate the folder C:\intepub\wwwroot\ and create a folder with the same name as your site.
  6. Add the following files to C:\inetpup\wwwroot\{site name}:
    • server.js
    • web.config
  7. Open the terminal and install ExpressJs using npm install express.
  8. Write your server script in server.js to create an express server.
    var express = require("express");
    var app = express();
    
    app.get("/ping", function(req, res) {
      res.send("Pong!");
    });
    
    app.listen(process.env.PORT, () => {
      console.log("listening");
    });
  9. Add the following to web.config

    <configuration> 
        <system.webServer>
      
         <handlers>
           <add name="iisnode" path="server.js" verb="*" modules="iisnode" />
         </handlers>
      
         <rewrite>
           <rules>
             <rule name="nodejs">
               <match url="(.*)" />
               <conditions>
                 <add input="{REQUEST_FILENAME}" matchType="IsFile" negate="true" />
               </conditions>
               <action type="Rewrite" url="/node_app.js" />
             </rule>
           </rules>
         </rewrite>
      
         <security>
           <requestFiltering>
             <hiddenSegments>
               <add segment="node_modules" />
               <add segment="iisnode" />
             </hiddenSegments>
           </requestFiltering>
         </security>
         <httpErrors existingResponse="PassThrough" />
         <iisnode nodeProcessCommandLine="C:\Program Files\nodejs\node.exe" />
         </system.webServer> 
     </configuration>

    This web.config file is written in XML and is used to configure settings for web applications hosted on Internet Information Services (IIS). It allows you to define how IIS should handle requests, manage security settings, rewrite URLs, handle custom error messages, and integrate with specific modules like iisnode for hosting Node.js applications.

Note: If you are having trouble creating or editing files in C:\inetput\wwwroot\{your site} , right click and open properties. Add your user if it does not exist and check the full control box to make the process of editing and creating files easier. In most cases this requires administrative control.

And with that we have served node applications on IIS!

Categories
MySQL Programming Projects Web Programming

A Hacky Way to Scrape Linkedin

Recently, I was tasked with building a Chrome extension that scrapes LinkedIn profiles to gather important information such as name, bio, location, follower count, and connection count from a list of predetermined URLs. Once collected, this data needs to be saved to a database using a POST request with Sequelize as the ORM. This is fairly simple and straightforward to do.

  1. Set up a SQL database and create aΒ  User model using Sequalize.
  2. Create an Express server.
  3. Develop the Chrome Extension.

I was expecting this to be very simple and thought it wouldn’t take more than 30-40 minutes. I developed the backend for this as you would do with any other web dev project and this was probably the easiest task. Developing the chrome extension is what took the longest. I’ll walk you through my thought process and what mistakes I made while developing this. I will focus more on the scraping part and the Chrome Extension in this article and not the creation of the REST API using Node and Express. You can read more about how to create REST APIs using Node.js and Express here.

Project Structure

.
β”œβ”€β”€ Backend
|   β”œβ”€β”€ Models
|   |   └── User.js
|   β”œβ”€β”€ node_modules
|   β”œβ”€β”€ .env
|   β”œβ”€β”€ .gitignore
|   β”œβ”€β”€ db.js
|   β”œβ”€β”€ server.js
|   β”œβ”€β”€ package.json
|   └── package-lock.json
└── Extension
    β”œβ”€β”€ manifest.json
    β”œβ”€β”€ index.html
    β”œβ”€β”€ icon.png
    β”œβ”€β”€ style.css
    β”œβ”€β”€ script.js
    β”œβ”€β”€ content.js
    └── background.js

Models/User.js

import { DataTypes } from "sequelize";
import sequelize from "../db.js";

const User = sequelize.define('User', {
    id: {
        type: DataTypes.INTEGER,
        primaryKey: true,
        autoIncrement: true,
      },
      name: {
        type: DataTypes.STRING,
        allowNull: false,
      },
      url: {
        type: DataTypes.STRING,
        allowNull: false,
      },
      about: {
        type: DataTypes.STRING,
        allowNull: true,
      },
      bio: {
        type: DataTypes.STRING,
        allowNull: true,
      },
      location: {
        type: DataTypes.STRING,
        allowNull: true,
      },
      followerCount: {
        type: DataTypes.NUMBER,
        allowNull: false,
      },
      connectionCount: {
        type: DataTypes.NUMBER,
        allowNull: true,
      },
}, {
    tableName: 'users',  
    timestamps: false,
});

export default User;

./Db.js

import dotenv from 'dotenv';
import { Sequelize } from "sequelize";

dotenv.config();

const sequelize = new Sequelize(process.env.DB, process.env.USER, process.env.PASSWORD, {
  host: 'localhost',
  dialect: 'mysql',
})

async function testConnection() {
    try {
      await sequelize.authenticate();
      console.log('Connection has been established successfully.');
    } catch (error) {
      console.error('Unable to connect to the database:', error);
    }
  }
  
testConnection();
  
export default sequelize;

./server.js

import cors from 'cors';
import dotenv from 'dotenv';
import express from 'express';
import User from './models/User.js';

dotenv.config();
const app = express();
app.use(express.json());
app.use(cors());

const port = process.env.PORT || 3000;

app.post('/getinfo', async (req, res) => {
    try {
        const { name, url, about, bio, location, followerCount, connectionCount } = req.body;
        const newUser = await User.create({
            name: name, url: url, about: about, bio: bio, location: location, followerCount: followerCount, connectionCount:connectionCount,
        })
        res.status(200).send(newUser);
    } catch (err) {
        console.log(err.message);
    }
})

app.get('/ping', (req, res) => {
    res.send('pong');
})

app.listen(port, () => {
    console.log(`Server is running on port ${port}`);
  });

Next I had to figure out how to do basic stuff using Chrome Extensions. Since I had not much experience in this to begin with I spent some time learning this.

So as you know that we can have content_scripts in our extensions which will inject javascript scripts in the client’s browser, which will run on all websites which match with the listed matches in yourΒ  manifest.json. So let us break down the task of creating this Chrome Extension into smaller chunks:

  1. Get list of linkedin profile urls from a popup.
  2. Open each url from the list of urls.
  3. Get user info from each linkedin page.
  4. Perfom a POST request to our backend server to save it to the database.

The first chunk is actually very easy. Create a manifest.json and add the following to it.

{
  "manifest_version": 3,
  "name": "Linkedin Data Extractor",
  "description": "A chrome extension for a TechKnowHow article.",
  "version": "1.0",
  "action": {
    "default_popup": "index.html",
    "default_icon": "icon.png"
  },
  "permissions": [
    "activeTab",
    "scripting"
  ],
  "content_scripts": [
    {
      "matches": ["https://www.linkedin.com/in/*"],
      "js": ["content.js"],
      "run_at": "document_idle"
    }
  ],
  "background": {
    "service_worker": "background.js"
  }
}

Note the permissions, content_scripts, and background scrips. Now create index.html and style.css and append the follwing to it.

<!DOCTYPE html>
<html>
<head>
  <title>LinkedIn Data Extractor</title>
  <link rel="stylesheet" href="style.css">
</head>
<body>
  <h1>Extract LinkedIn User Data</h1>
  <textarea id="linkedinUrls" rows="5" placeholder="Paste LinkedIn profile URLs (minimum 3)"></textarea>
  <button id="extractButton">Extract Data</button>
  <script src="script.js"></script>
</body>
</html>
body{
    width: 300px;
    display: flex;
    flex-direction: column;
    gap: 10px;
    align-items: center;
}
textarea{
    width: 95%;
}
button{
    height: 40px;
    width: 100px;
    background-color: rgb(149, 205, 65);
    color: black;
    border: 0.5px solid black;
}

Now let us write the logic for getting the linikedin urls and openinng them in individual tabs one by one in script.js.

document.getElementById('extractButton').addEventListener('click', async () => {
    const urls = document.getElementById('linkedinUrls').value.split('\n').filter(url => url.trim());
    if (urls.length < 3) {
      alert('Please provide at least 3 LinkedIn profile URLs');
      return;
    }
    for (const url of urls) {
        await chrome.tabs.create({ url }); 
    }
});

okay so what is exactly happening here? We’ve added an event listener to the button and we are getting the urls and if they’re less than 3 then we are throwing an alert saying Please provide at least 3 LinkedIn profile URLs. And if we get more than 3 urls then we are opening them one by one in new tabs using chrome.tabs.create(). While creating Chrome Extensions to perform any task which deals with getting stuff from the webpage or opening new tabs, etc we need to use the chrome API which enables us to perform all these operations. You can find more stuff on Chrome APIs here.

With that we are able to open the urls one by one now we just need to get the info from the pages. Okay so my first instinct was to just document.querySelector(classname)and get the details. So I tried to do that for just the name at first to see if it works. And it worked! So I continued with the same approach to get the details of all the fields. Now here’s when I encountered a problem. I was able to get name, location, bio but null was being returned for all the remaining stuff, and I just couldn’t figure out why. If I was getting null while retreiving all the fields I would’ve realized what the problem was much earlier but since I was facing this issue only for half the things it took me a considerable amount of time to understand where I was going wrong.

My debugging process

So since I was running a content_script it was being run in the client’s browser so I logged everything into the user’s console like so.

// content.js

const nameElement = document.querySelector("h1").innerText;
const bioElement = document.querySelector(".text-body-medium").innerText;
const locElement = document.querySelector(".text-body-small.inline.t-black--light.break-words").innerText;
const followersElement = document.querySelector('.artdeco-card .rQrgCqdAxxLhIAcLhxdsifdagjxISOpE span').innerText;
const aboutElement = document.querySelector(".JSzNEGEyfojpwDGomLCFeVXPtVfgJfKE span").innerText;
const connectionElement = document.querySelector(".OnsbwwsPVDGkAkHfUohWiCwsWEWrcqkY").innerText;

console.log(nameElement);
console.log(bioElement);
console.log(locElement);
console.log(followersElement);
console.log(aboutElement);
console.log(connectionElement);

Only name, bio & locaion were logged and for everything else I got the following error.
Cannot get innerText for null, which basically means that the html tag that we were trying to locate was not found.

What was the problem?

Whenever we reload the page takes some time to load. If we try to access these html tags before they are even generated we will be returned null. So why were we able to get name, bio & location?

This was probably because the class names for name, bio & location do not change, on the contrary the class names for the remaining tags seem to be random and probably generated instead of defined. These classnames might be different at the time you read this but the class names for name, bio & location would still be same.

How do we fix this?

Since the deadline for this task was right around the corner I came up with a hacky solution. I tried to get the tag every 100 miliseconds for 10 seconds. If I did not get the tag after 10 seconds then I simply threw an error. Lets look at the code for that.

function waitForElement(selector, timeout = 10000) {
    return new Promise((resolve, reject) => {
        const interval = 100;
        const endTime = Date.now() + timeout;
        const check = () => {
            const element = document.querySelector(selector);
            if (element) {
                resolve(element);
            } else if (Date.now() < endTime) {
                setTimeout(check, interval);
            } else {
                reject(
                    new Error(
                        `Element with selector "${selector}" not found within ${timeout}ms`
                    )
                );
            }
        };
        check();
    });
}

Now instead of using document.querySelector() use await waitForElement().

function waitForElement(selector, timeout = 10000) {
    return new Promise((resolve, reject) => {
        const interval = 100;
        const endTime = Date.now() + timeout;
        const check = () => {
            const element = document.querySelector(selector);
            if (element) {
                resolve(element);
            } else if (Date.now() < endTime) {
                setTimeout(check, interval);
            } else {
                reject(
                    new Error(
                        `Element with selector "${selector}" not found within ${timeout}ms`
                    )
                );
            }
        };
        check();
    });
}

async function extractLinkedInData() {
    try {
        const nameElement = await waitForElement("h1");
        const bioElement = await waitForElement(".text-body-medium");
        const locElement = await waitForElement(
            ".text-body-small.inline.t-black--light.break-words"
        );
        const followersElement = await waitForElement(
            '.artdeco-card .rQrgCqdAxxLhIAcLhxdsifdagjxISOpE span'
        );
        const aboutElement = await waitForElement(
            ".JSzNEGEyfojpwDGomLCFeVXPtVfgJfKE span"
        );
        const connectionElement = await waitForElement(
            ".OnsbwwsPVDGkAkHfUohWiCwsWEWrcqkY "
        );

        const followerCount = parseInt(
            followersElement.innerText
                .replace(/,/g, "")
                .replace(" followers", "")
        );

        const user = {
            name: nameElement.innerText,
            bio: bioElement.innerText,
            location: locElement.innerText,
            followerCount: followersElement.innerText
                .replace(/,/g, "")
                .replace(" followers", ""),
            about: aboutElement.innerText,
            url: document.URL,
        };

        const connectionText = connectionElement.innerText.replace("\n", "");
        if (/\d+([+])? connections/.test(connectionText)) {
            user.connectionCount = 501;
        } else if (/\d+([+])? connections/.test(connectionText)) {
            const connectionCount = parseInt(
                connectionText.replace(" connections", "")
            );
            user.connectionCount = connectionCount;
        }
        console.log(user);
        chrome.runtime.sendMessage({ type: "user_data", data: user });
    } catch (error) {
        console.error("Error fetching elements:", error);
    }
}

extractLinkedInData();

Now the only thing that is left to do is to perform a POST request. I tried to do that just after getting all the tags in the extractLinkedInData()just to realise that you cannot do things like perform API calls or HTTP requests from the client console on some pages. LinkedIn does not allow this, so we have to figure out another way to do this.

We send a runtime message using Chrome API and listen for this in background.js and perform the POST request from there.

// background.js

chrome.runtime.onMessage.addListener(function (message, sender, sendResponse) {
  if (message.type === "user_data") {
      fetch("http://localhost:5555/getinfo/", {
          method: "POST",
          headers: { "Content-Type": "application/json" },
          body: JSON.stringify(message.data),
      })
          .then((response) => response.json())
          .then((result) => {
              console.log("Success:", result);
          })
          .catch((error) => {
              console.log("Error:", error);
          });
  }
});

And with that we’re done!

The last part where we performed the POST request from background.js rather than content.js was similar to the problems I faced in a pervious article on electron.js where certain scripts do not have access to node packages. That article covers how to read data from the serial port in a desktop application.
If you know a better way to do something similar let me know in the commentsπŸ‘‡πŸ»

Categories
Projects

Voxa – Our Journey from Idea to Implementation

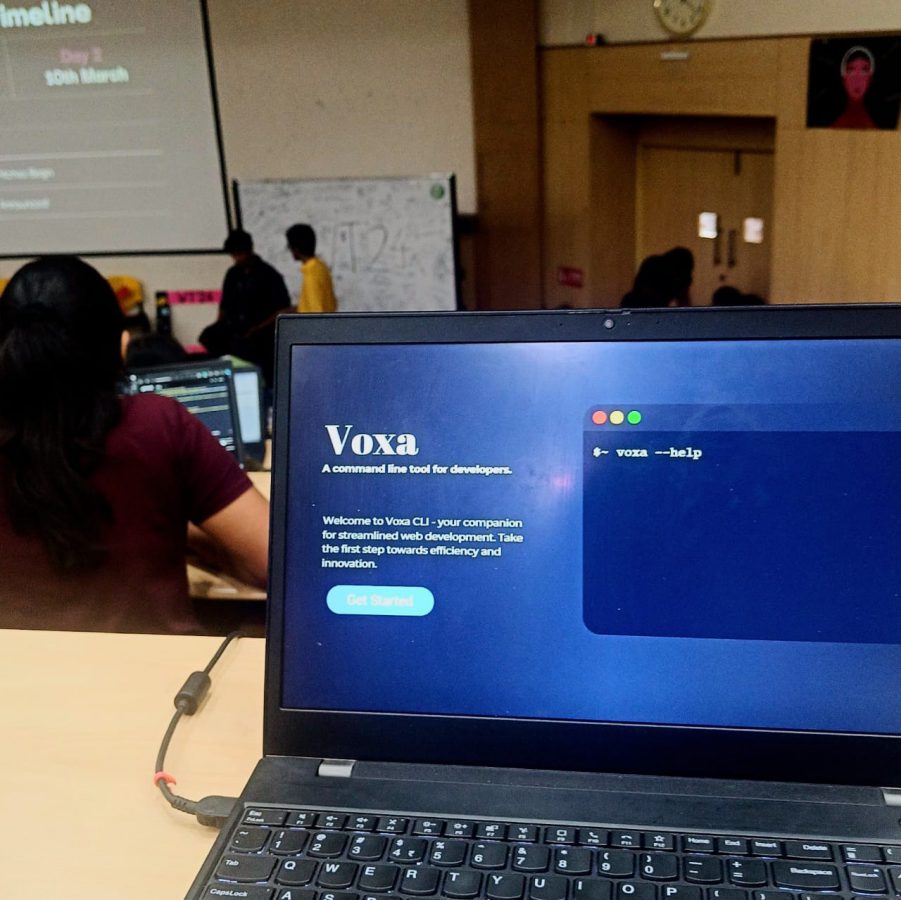
A while back, Prakriti and I participated in Women Techies, a hackathon at our university organized by the Google Developer Student Clubs at VIT Vellore. Our goal was simple: reach the final pitches and present on stage. Our journey began with a flurry of ideas as Prakriti and I brainstormed potential projects. We wanted to create something impactful, something that could stand out among the plethora of brilliant concepts around us. After several rounds of discussion and plenty of coffee, we finally landed on an idea that sparked our enthusiasm. We decided to make a command line tool for developersβ€”a project that would give us a break from developing solutions for others and allow us to create something we would actually use.

Developing a tool to solve a problem we personally faced made the process both easier and more enjoyable. Knowing the ins and outs of the issue meant we could design a solution that truly met our needs, making the project not just a task but a passion-driven venture. As usual, we started by laying out the basic blueprint of our project, refining the idea as we progressed. We carefully selected a few key features and decided on the tech stack we would use. While GoLang or Rust would have been ideal for building a CLI, we opted for JavaScript, a language we were both comfortable and proficient with. This choice allowed us to focus on delivering a robust and functional tool without the added hurdle of learning a new language under time constraints.

The hackathon began, and the clock started ticking. We jumped right into programming and quickly completed two of the easier features while also setting up the GitHub repository. Neither Prakriti nor I are big fans of frontend development, so we were relieved that this project required no Figma designs or frontend coding. This allowed us to focus entirely on the backend and functionality, which played to our strengths and made the development process more enjoyable. As Review 1 approached, we decided to stop working on newer features and instead focused our efforts on polishing and refining the ones we had already completed. Our aim was to ensure that they were not only presentable but also free of bugs. One of my favorite practices during hackathons is to create a concise document that encapsulates the essence of our idea in a few bullet points, along with bullet points on what parts of the code we have completed and what we will be working on after the review. This document serves as a handy reference for ourselves and for any potential reviewers, providing a clear overview of our progress and direction. Since reviewers do not have a lot of time on their hands and teams spend a lot of time on presentations this gives them exactly what they want to know to look at while you present.

After review 1 we hit a roadblock. We had spent too much time on trying to develop features and we were no close to completing them than we were a few hours ago.

This is where most teams in hackathons fail. Failing to build something they planned on or taking too long and not being able to complete it in the give time frame is something which we generally struggle with. Sometimes it makes sense to think of something new instead of sticking to the same thing you’ve been trying to do considering the ideating phase in hackathons is short.

We were tired, frustrated and this was when we felt like we would not achieve our goal of reaching the final pitches. We thought for some time and decided to scrap those features and started brainstorming features that we could replace them with. Now we had something to look forward to. We weren’t stuck anymore! This was around the same time when the GDSC organisers had started jamming.

We decided to add an agile tracker to our cli and a couple more features. We sat overnight and completed a major chunk of the newer features and took a small nap. After waking up with a fresh mind fueled with coffee we got back to programming. We finished the tasks with the highest priority first. Since review 2 was sneaking up on us and a requirement for it was to have a presentation we got to making that as well on the side. Our designing skills aren’t really the best so we had to get some inspiration from here and there but 30 minutes later we had a decent presentation. Review 2 went well – all of our features worked well and there seemed to be no bugs. The only part that was left was a bit of documentation. Technically speaking the hacking time was over and now we just had to wait for the results to see if we made it to the final pitches. We were pretty tired so instead of finishing the documentation we took a pizza break instead.

2 hours later the results of the top 10 teams were up. There we were on screen! The debugging ducks
made it to the final pitches!

As the second-to-last team to pitch, we had the opportunity to witness the impressive projects developed by the other teams. Each presentation showcased a unique blend of creativity, technical prowess, and innovation. One project that particularly stood out was created by a team of freshmen who had developed an augmented reality app using Unityβ€”a remarkable achievement considering the short 36-hour time frame of the hackathon. Soon after that results were announced.

We learnt a lot from this experience. The biggest learning being that hackathons are not just about having the best programming team out there. A successful hackathon team includes skill, presence of mind, hardwork, and a good idea to begin with. Programming is just a way for you to bring your ideas to reality at a hackathon it doesn’t matter if you have the best backend if your idea is generic. An unstable/hacky solution to a real problem has a better chance at winning rather than a really well programmed generic solution.

Don’t be afraid to change things mid way and try things out, that could be the difference between making it to the final pitches and getting eliminated in the final review. In a hackathon not too long ago a team changed their entire idea mid way and still managed to win in their track.
Keep Hacking!