Topics discussed
- What is Git?
- Git terminology
- Git Installation and setup
- What is GitHub?
- Basic functionalities of GitHub using Git
What is Git?
Git can be described as a distributed version control system that tracks changes in any set of computer files, used mainly for coordinating work among programmers who are collaboratively developing source code during software development. It aims to support data integrity and non linear workflows.
Another way of understanding it is that Git views data as a series of snapshots of a mini file system. With every commit (discussed in the next segment) of the state of your project files Git takes a snapshot of the current status of your files and stores a reference to that snapshot.
Git Terminology
Commit: This command captures a snapshot of the project’s currently staged changes. Committed snapshots can be considered as “safe” versions of a project, they will not be changed unless explicitly stated.
Repository: It is like a data structure used by VCS (version control system) to store metadata for a set of files and directories. It contains the collection of files as well as the history of changes made to those files. Repositories in Git can be considered to be a project folder.
Branch: A branch is a version of the repository that diverges from the main working project. It is an essential feature available in most modern version control systems. A Git project can have more than one branch.
Remote: The term remote is used with respect to the remote repository. It is a shared repository that all team members use to exchange their changes. A remote repository is stored on a code hosting service like an internal server, GitHub, Subversion and more.
Origin: It is a reference to the remote repository from a project that was initially cloned. It is used instead of that original repository URL to make referencing much easier.
Pull Request: The term Pull is used to receive data from GitHub. It fetches and merges changes on the remote server to your working directory. Pull requests are used by developers to notify team members that a feature has been completed and the team members need to review the code and merge it with the master branch.
Push Request: Uploading local repository content to a remote repository. Pushing is an act of transferring commits from your local repository to a remote repository.
Git Installation and Setup
- Step 1: Google git and click on the first search result that pops up which should be the git official website – Git SCM (https://git-scm.com/) and scroll till you see the download for windows button and click on it. Click on the ‘click here to download’ button to download it.
- Step 2: After downloading this executable file click on it to start the setup. The first window is about the public licence. Click on next to continue.
- Step 3: Next window is about the location where Git will be installed. Click on next if there is no good reason to change the location.
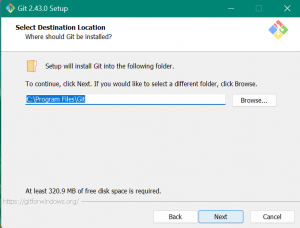
- Step 4: Next window is for selecting components. Here you can choose to add an additional icon by clicking the check box. Click on next to continue.
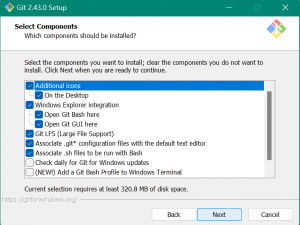
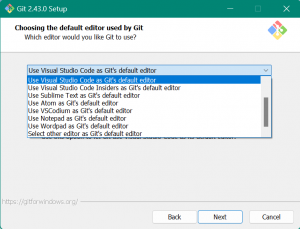
- Step 5: Here you can select the start menu folder. Leave it as it is and click on next. Here you can choose your default editor. I’ve chosen Visual Studio Code.
- Step 6: In the next window select the option to ‘override default branch name’ and give the name as ‘main’. This is because when you use Git with GitHub, the default branch name on Git is ‘main’.

- Step 7: Leave the settings in their default state for the next few windows till the window for ‘configuring experimental options’ is reached. Select both the available options and click on install.
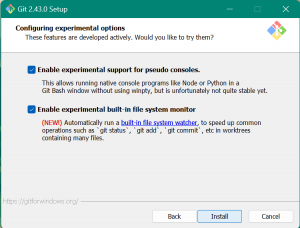
- Step 8: After installation of all the files, check the box which says ‘Launch Git Bash’ and uncheck the other box and click on finish.
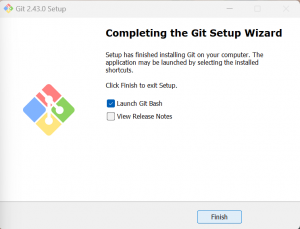
This concludes the basic setup of Git. The next segments will elaborate on GitHub and how to use it using Git.
What is GitHub?
GitHub is an AI-powered developer platform that allows developers to create, store, and manage their code. It uses Git software, providing the distributed version control of Git plus access control, bug tracking, software feature requests, task management, continuous integration for every project. It is mainly used to hold open source software development and allows the tracking, storing and collaboration on software development projects.
Basic functionalities of GitHub using Git
Let’s start from scratch here. If you’ve never used GitHub before, start by making a GitHub account by going to the GitHub official website and clicking the signup option and filling in the necessary details.
Now that we have our account setup, let’s go back to Git. Locate the Git folder on your PC. In it you will find some options to choose from like Git GUI, Git Bash etc.
We will work with Git Bash.
One of the first we must get into to get started is to commit a file of code. Follow the steps given below:
- Step 1: Locate whatever code you want to commit in your file explorer. Here I’m using an html file as an example. Right click on the file and click on ‘show more options’ and then click on Git Bash. This opens a terminal.

- Step 2: In the terminal the first command w indeed to give is the
git initcommand which will initialise git in this folder.

- Step 3: Now if the
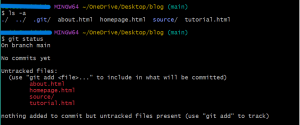
lscommand is given, a .git folder can be seen. - Step 4: Now we can check the git status by giving the command
git status. It will show some untracked files which are the files we are working with right now.
- Step 5: The next step is to add this file by giving command
git add [file_name]. Now ifgit statusis run, the files will be seen in green indicating that the files have been added to git but need to be committed. - Step 6: Before committing our files we need to configure git. Do this by running two commands
git config --global user.email “your email”andgit config --global user.name “Your name”.

- Step 7: After configuring git and adding all the files, commit them using the command
git commit -m “comment” [file_name](you can give any comment). Now if we check git status it will show that there is nothing to commit.

- Step 8: Now going back to GitHub. Once on the website with your account, click on ‘new repository’ to make a new repository. Usually the name is the name of the main folder. Here it is ‘blog’. Add a description and you can also add the README file, licence etc. then click on create repository.
Now we will create a GitHub token which will be required to push our code into the repository. - Step 1: Click on your profile on the GitHub homepage and then go to settings.
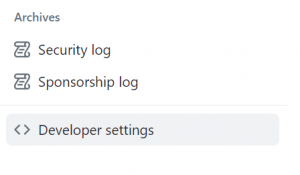
- Step 2: Scroll to the bottom and find the ‘developer settings’ option.
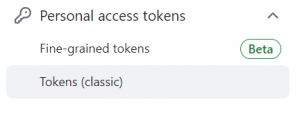
- Step 3: Next click on personal access tokens and go to the ‘token (classic)’ option.
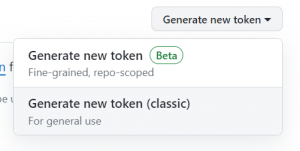
- Step 4: Next click on ‘generate new token (classic)’ , name your token and specify the expiration date.
- Step 5: Now under select ‘scope’ check all the check boxes and generate the token.
- Step 6: The token generated can only be seen once. Thus, it is a good idea to copy it and store it somewhere safe.
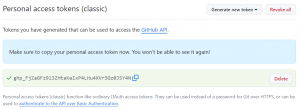
- Step 7: This token will now be used in the next command to be executed on Git Bash. Give the command
git remote add origin https://[token]@github.com/[user_name]/[repo_name.git]. This command will add the remote origin of the current project.
- Step 8: Now give the push command
git push -u origin main. This command will push your code into GitHub.
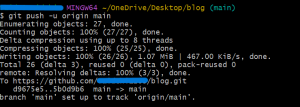
- Step 9: After this if you refresh your GitHub page you should be able to see your code files in your repository.
This covers the basic commit and push operations on Git. Let us now see how we can make changes to the code file and update it in GitHub using Git. - Step 1: Give the command
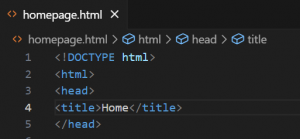
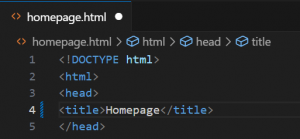
lsto see all the files currently committed. - Step 2: Next give the command code . which will open the code files in your chosen editor. (Here it is Visual Studio Code).
- Step 3: Make the required changes in the code and save.
- Step 4: Give
git statuscommand. It will show that there is some uncommitted code.

- Step 5: Commit this code by giving
git commit -m “comment” [file_name]command.

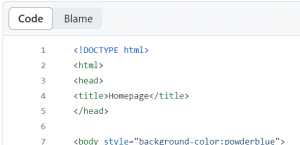
- Step 6: Every time a code is committed, it needs to be pushed as well. So, push the code using
git push -u origin maincommand and the changes made should be reflected in the repository on the GitHub website.

With Git and GitHub in your arsenal, you’re now equipped to track changes, collaborate effectively, and build a portfolio of your work. Don’t hesitate to explore more advanced features, delve into online resources, and keep practising. The possibilities are endless, so keep learning, keep creating, and keep pushing your code.
Be First to Comment