XAMPP is an open-source web server distribution which has become the de facto package used while handling PHP files.
XAMPP stands for (X) Cross-platform Operating System, Apache, MySQL, PHP and Perl.
Installing and setting up XAMPP
The official XAMPP installer, provided by Apache can be found at https://www.apachefriends.org/download.html , for various operating systems.
Installing and setting up the XAMPP control panel, the user can access it as such:
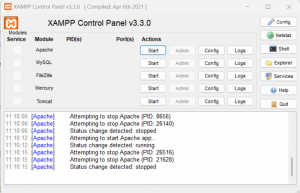
The XAMPP Control Panel provides access the various components of the user’s server.
Creating a Demo webpage
To demonstrate the working of the server, we can create a simple webpage, using HTML and PHP, which can be accessed through the server.
The “htdocs” folder can be found where XAMPP was installed. The files and content to be accessed in the web server need to be saved in this folder.
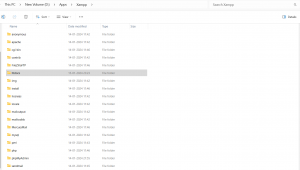
Using HTML, we can create a webpage which utilizes a form to collect any arbitrary data from the user. In this case, a variety of buttons are created, each having its own value, as per the user’s preference.
<!-- index.html -->

<!DOCTYPE html>
<html lang="en">
<head>
    <meta charset="UTF-8">
    <title>Image of an Egg</title>
</head>
<style>
    .content {
      max-width: 500px;
      margin: auto;
    }
    </style>
<body>
    <div class="content">
    <h1>Welcome to Image of an Egg</h1>
    <h2>Here's the aforementioned image</h2>
    <img src="Egg pictures/Og egg.jpg">
    <p>Get a personalized egg prepared for you</p>
    <form action="final_egg.php", method="post">
        What is your name? :- <input type="text" name="name"><br>
        <p>What kind of egg would you like?</p>
        <input type="submit" name="action" value="Fried"/>
        <input type="submit" name="action" value="Hard Boiled" />
        <input type="submit" name="action" value="Poached" />
        <input type="submit" name="action" value="Scrambled" />
        <input type="submit" name="action" value="Soft Boiled" />
        <input type="submit" name="action" value="Omelette" />
        <input type="submit" name="action" value="Set free" />
    </form>
    </div>
</body>
</html>
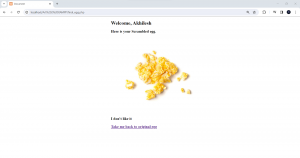
We can use PHP to create a webpage which accesses information provided by the user in the previous page and uses it to personalize the endpage. The PHP file accesses user information from the server-side, to create a better frontend experience. An anchor tag is also provided so that users can return to the original page.
<!-- egg_preference.php -->

<!DOCTYPE html>
<html lang="en">
<head>
    <meta charset="UTF-8">
    <meta http-equiv="X-UA-Compatible" content="IE=edge">
    <meta name="viewport" content="width=device-width, initial-scale=1.0">
    <title>Document</title>
</head>
<style>
.content {
  max-width: 500px;
  margin: auto;
}
</style>
<body>
<div class="content">
    <h1>Welcome, <?php echo $_POST["name"];?></h1>
    <h2> Here is your <?php echo $_POST["action"]; ?> egg.<h2>
    <?php if($_POST['action']=='Fried') : ?>
        <img src="Egg pictures/egg fried.jpg">
    <?php elseif($_POST['action']=='Hard Boiled') : ?>
        <img src="Egg pictures/egg hard boiled.jpg">
    <?php elseif($_POST['action']=='Poached') : ?>
        <img src="Egg pictures/egg poached.jpg">
    <?php elseif($_POST['action']=='Scrambled') : ?>
        <img src="Egg pictures/egg scrambled.jpg">
    <?php elseif($_POST['action']=='Soft Boiled') : ?>
        <img src="Egg pictures/egg soft boiled.jpg">
    <?php elseif($_POST['action']=='Omelette') : ?>
        <img src="Egg pictures/omelette.jpg">
    <?php elseif($_POST['action']=='Set free') : ?>
        <img src="Egg pictures/free egg.jpg">
    <?php endif; ?>

    <p>I don't like it <br></p>
    <a href="Og egg page.html"><p>Take me back to original egg </p></a>
    </div>
</body>
</html>
Starting the Web server and accessing created webpages
The XAMPP Control Panel is used to start the Apache component. The XAMPP dashboard can accessed by typing http://localhost/dashboard in the address bar of any web browser.
The created webpages can be accessed by typing the following format in the address bar:
http://localhost/<address of file, starting from htdocs>
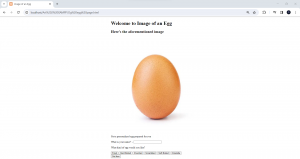
Created websites, as accessed via the web server:
Working in a MySQL database with XAMPP
MySQL is one of the most popular database management systems, which can organize and store data of many types, such as text, numerical information, dates, and also JSON.
A MySQL database can be easily built using the XAMPP Control Panel. The MySQL module has to be started, along with the Apache module.
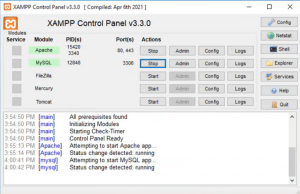
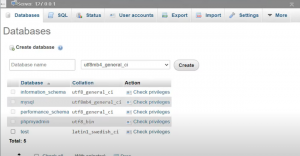
Use the Admin button in the MySQL to access the Admin page of the XAMPP server. Then navigate to the phpMyAdmin page.
Create the MySQL database by choosing the Database option from the drop-down menu.
In the Structure tab, the user can find the option to create a Table, with a specified name, number of columns and so forth.
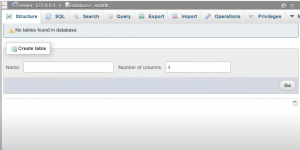
After creating the Table, the user can save the database, for future perusal and use. With a tool like XAMPP, the use of MySQL is further simplified, and accessibility is increased.

Be First to Comment